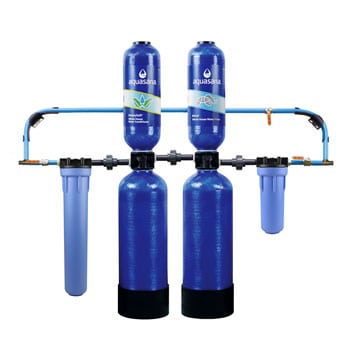
How to Install a Whole House Filtration System
 Now that you have received your whole house filter, it’s time to install it. Installing a system is actually fairly easy, if you are at all handy. Be sure and read the manufacturer’s directions thoroughly. The instructions will have many tips and important points. Points such as your system can be installed outside as long as it is not in direct sunlight or subject to freezing temperatures. It should be installed upright, not laying down.
1.) The first step is to carefully remove the whole house water filter system from the shipping box. Keep an eye out for small pieces and parts.
2.) Remove the plastic caps from the threaded fittings. These caps were to protect the inlet and the outlet port. Make sure there are washers inside the ports.
3.) The next step is to precondition the whole house filter. This is done by using a garden hose to flush out air, and any small carbon particles, that are left inside.
Connect the supplied adapter to the inlet side of the whole house filter
Attach a garden hose to the other end of the adapter. Slowly turn on the water and let it run for 2-5 minutes, until the water flows clear. The first few gallons will flush the air, and what are known as carbon fines, out of your whole house filter. These carbon fines are just small carbon particles that are left over from when they manufactured your whole house filter. Black, or cloudy water is perfectly normal for the first 2-5 minutes.
Next, turn the water off. Then turn the water on for 30 seconds. Then turn the water off for 30 seconds. Do this for 5-10 minutes. This on-off-on action is known as ‘Surge Flushing’. The second that you turn the water on, you will see more carbon fines get flushed out of the outlet. Surge flushing for 5-10 minutes will flush out all of these fines, and the water will flow clear, even when first turned on.
4.) Place the unit near where you want to install it. The best place is as close as possible to your main water shut-off. You will need to shut this valve off. This valve will have 2 pipes. One is the water inlet from the street, and the other is the water outlet to your home plumbing.
Did you shut the valve off? Make sure that when you cut the water line, you cut on the right side of the valve. You want to cut on the outlet side of the valve. The side with the pipe that goes into your house. Do NOT cut the pipe between the valve and the ground or cement wall. You want the pipe that goes to your plumbing.
5.) After you have cut the pipe, you can then use the included fittings to install your house water filter. Make sure and only use Teflon tape when installing your whole house filter. Using pipe dope can damage your whole house filter. Make sure that you don’t over-tighten the fittings.
6.) After the unit is installed slowly turn the main water valve on. Inspect for any leaks.
7.) If there are no leaks, then go to the closest faucet. Turn the water on slowly to flush the air out of your plumbing.
That’s all there is to it. You can now enjoy clear, clean water for years to come.
